Setting up a drink station for events requires strategic planning around location, equipment, and guest flow management. A successful beverage station combines accessibility with efficiency, ensuring guests can easily serve themselves while maintaining drink quality throughout your event. The key elements include adequate space planning, proper equipment preparation, temperature control, and an organised layout design that prevents congestion while encouraging smooth guest interaction.
What makes a drink station successful at events?
A successful drink station combines strategic location, efficient guest flow management, and easy accessibility for all attendees. The station should be positioned away from main traffic areas while remaining visible and convenient, with enough space around it to prevent bottlenecks during peak serving times.
Location plays the most important role in your drink station setup. Choose a spot that’s easily accessible from multiple directions but doesn’t interfere with other event activities. Avoid placing your beverage station near entrances, exits, or food serving areas where crowds naturally gather. The ideal location allows guests to approach, serve themselves, and move away without creating queues that block other activities.
Guest flow management determines whether your station enhances or hinders your event experience. Design your layout so guests can approach from one side, move along the station while making selections, and exit from the opposite end. This prevents people from crossing paths or reaching over each other, which often creates confusion and delays.
Visual accessibility helps guests understand what’s available without crowding around to investigate. Use clear signage for different drink types, especially when offering both alcoholic and non-alcoholic options. Position popular items at eye level and ensure guests can see all available choices from a reasonable distance. This reduces the time people spend deciding and keeps the line moving smoothly.
How much space do you actually need for a drink station?
A basic drink station requires minimum dimensions of 6 feet wide by 4 feet deep for intimate gatherings of 20–30 people. Larger events need proportionally more space, with 8–10 feet of width recommended for groups of over 50 guests, plus additional clearance space of at least 3 feet on all accessible sides.
The serving surface itself needs adequate room for drink containers, ice buckets, serving tools, and napkin dispensers. Calculate roughly 2 feet of table length for every 10 guests at your event. This ensures you have enough space to display various drink options without overcrowding the station, which makes self-service difficult and creates an unappealing presentation.
Traffic flow considerations require additional space beyond your actual serving area. Allow at least 6 feet of clearance in front of your station for guests to queue comfortably. If your event includes elderly guests or anyone with mobility aids, increase this clearance to a minimum of 8 feet. Side clearances of 3–4 feet prevent guests from feeling cramped while accessing drinks.
Venue constraints often require creative adaptations to standard space recommendations. In smaller venues, consider using corner locations that maximise available space while maintaining accessibility. Narrow spaces work better with linear station designs rather than traditional rectangular setups. For outdoor events, account for additional space needed for weather protection equipment like umbrellas or canopies.
Multiple smaller stations often work better than one large station for events of over 100 people. This approach distributes guest traffic, reduces waiting times, and allows you to position beverage service closer to different activity areas. Plan for roughly one station per 75–100 guests to maintain efficient service throughout your event.
What equipment and supplies should you prepare for your drink station?
Essential equipment includes large coolers or ice tubs, serving utensils like tongs and ladles, appropriate drinkware for your beverage types, napkin dispensers, and backup supplies including extra ice, towels for spills, and additional serving tools to maintain smooth operation throughout your event.
Ice management equipment forms the foundation of effective beverage service. Large insulated coolers work better than multiple small containers because they maintain temperature longer and require fewer refills. Plan for roughly 1–2 pounds of ice per person for events lasting 3–4 hours. Include ice scoops or tongs rather than expecting guests to use glasses or their hands, which creates hygiene concerns and accelerates ice melting.
Serving tools should match your beverage selection and serving style. Ladles work well for punch bowls, while tongs are perfect for retrieving bottled drinks from ice. Include bottle openers for non–twist-cap beverages and corkscrews if serving wine. Having multiple sets prevents queues when one tool is in use and provides backups if items are misplaced during busy periods.
Drinkware selection depends on your event style and beverage types. Plastic cups work well for casual outdoor events and eliminate breakage concerns, while glassware suits formal indoor gatherings. Consider different sizes for various drinks – smaller glasses for spirits, larger ones for soft drinks or beer. Plan for 1.5–2 glasses per person to account for guests setting drinks down and taking fresh ones.
Support supplies keep your station functioning smoothly throughout the event. Include plenty of napkins in dispensers that won’t blow away outdoors. Pack absorbent towels for quick spill cleanup and wet wipes for sticky surfaces. Rubbish bins positioned nearby encourage guests to dispose of empty bottles or cans properly. Backup ice, extra napkins, and replacement serving tools prevent service interruptions during peak times.
How do you keep drinks cold and fresh throughout your event?
Maintain drink temperature through strategic ice placement, pre-chilled beverages, insulated containers, and frozen drink options that stay cold naturally. Start with everything pre-chilled, use separate ice containers for different drink types, and replenish ice regularly rather than waiting until it’s completely melted.
Pre-chilling all beverages before your event starts gives you a significant temperature advantage that lasts hours longer than starting with room-temperature drinks. Refrigerate bottled and canned beverages overnight, and chill any mixed drinks or punches thoroughly before transferring them to serving containers. This initial preparation reduces the ice burden on your cooling system during the event.
Ice placement strategy affects both temperature maintenance and presentation quality. Use separate ice containers for different beverage types to prevent flavour mixing and maintain appropriate cooling methods. Bottled drinks benefit from surrounding ice, while punch bowls work better with ice rings that melt slowly without diluting the mixture. Replace melted ice every 2–3 hours rather than simply adding new ice on top.
Insulated serving containers significantly extend the time drinks stay properly chilled. Large insulated dispensers work excellently for mixed drinks, keeping contents cold for 6–8 hours with proper pre-chilling. For bottled beverages, use insulated tubs or coolers rather than decorative bowls that offer no temperature protection. Cover containers when possible to reduce heat transfer from ambient air.
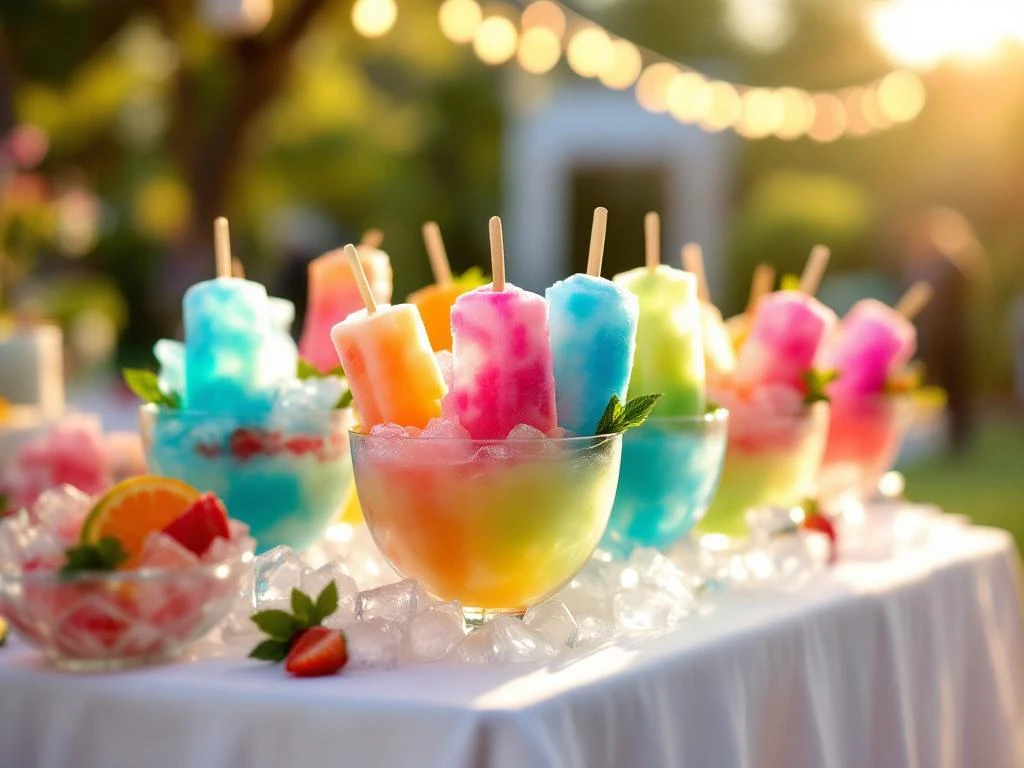
Frozen cocktails and similar frozen drink options solve temperature maintenance challenges naturally while offering uniquely refreshing experiences. These products freeze solid in home freezers and gradually return to optimal serving consistency, staying cold throughout the consumption process. They’re particularly valuable for outdoor summer events where maintaining traditional drink temperatures becomes challenging.
Timing considerations help maintain quality throughout different event phases. Serve temperature-sensitive items like wine or craft beer during the cooler parts of outdoor events. For longer celebrations, plan to refresh your entire ice supply at the halfway point rather than gradually topping up. Monitor drink quality regularly and replace items that have lost optimal temperature or freshness.
What’s the best way to organise drinks for easy guest access?
Organise drinks using a logical hierarchy with popular items at eye level, group similar beverages together, create clear visual separation between alcoholic and non-alcoholic options, and design the layout to encourage a natural left-to-right flow that prevents guests from crossing paths while making selections.
Drink placement hierarchy puts the most popular beverages in prime positions where guests can access them quickly without blocking others. Position frequently chosen items like water, soft drinks, and beer at the front and centre of your display. Place speciality cocktails or wine at the ends where people can take time to consider options without impeding traffic flow. This arrangement reduces congestion around high-demand items.
Grouping similar beverages creates intuitive navigation that helps guests find desired drinks efficiently. Keep all alcoholic beverages in one section and non-alcoholic options in another clearly defined area. Within each category, group by type – beers together, wines together, spirits together. This logical organisation prevents guests from searching through the entire station for specific drink types.
Visual presentation techniques communicate available options clearly while encouraging smooth guest movement. Use different height levels to create visual interest and improve visibility of items in back rows. Employ clear signage that identifies drink types, especially for mixed cocktails or speciality beverages that aren’t immediately recognisable. Consistent spacing between items prevents overcrowding that makes selection difficult.
Self-service optimisation focuses on making the serving process as straightforward as possible. Place serving tools directly next to items that require them, such as ice tongs next to ice buckets or ladles beside punch bowls. Ensure adequate lighting so guests can clearly see what they’re doing, which is particularly important for evening events. Position napkins and cleanup supplies where guests naturally reach for them after serving themselves.
Traffic flow design prevents bottlenecks by creating clear entry and exit points for your beverage station. Arrange items so guests naturally move from one end to the other rather than clustering around a central point. Leave adequate space between different drink sections so multiple people can serve themselves simultaneously. Consider the natural hand dominance of most guests by placing popular items slightly to the right side of the station layout.
Creating an effective event drink station combines practical planning with guest experience considerations. Success comes from understanding how people naturally move and interact with self-service setups, then designing your beverage station to support those behaviours. Remember that a well-organised drink station enhances your entire event by keeping guests refreshed and happy while minimising host duties during the celebration. We specialise in frozen cocktails that simplify event beverage planning by maintaining perfect temperature and flavour throughout any gathering, making them an excellent addition to any well-planned drink station setup.